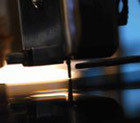
Thought I'd update you on my progress. I finished my second rev of the press. Still needs some work, but getting better results. Here is a view of the current setup. I now have top and bottom heated platens with much thicker 3/8" aluminum plates for more thermal mass. Still using the cheap hotplate heaters, so there are still hot spots. I now have thermocouples mounted on each platen to monitor temperature.


I now am able to press two sided using a book like arrangement with top and bottom stampers mounted to thin aluminum plates. You can see the home brew bushes I machined along with 4 screws around the OD to act as hold downs. The book is loaded with the powdered plastic. I'm still using craft store 9mm polysterene beads crushed in a coffee grinder. The top is placed on the book and the assebly is inserted into the press.


The raw result is shown here:

I'm having some problems getting the pressed result to fill properly. In the center, there are some voids. Not sure if this is due to outgassing or improper pressure/temp profile. Right now, I have no way to measure platen pressure (I'm working on adding as gauge for this).
I have a crude trimmer shown here:


The finished record here:

You can see the voids in the center cutout area. I am also seeing small voids on both record surfaces (the top is much worse and currently unplayable. The bottom is palyable, but each void makes a loud pop on playback. Otherwise, the surface sounds pretty quiet. I can post a sample is any interest.
I have also found that cooling by dunking in a cold water bath does not work well. The water gets into the mould area and boils out the plastic and leaves gaping voids. The result shown here was done by letting the mold cool slowly. I need to build a cooling unit to speed up the process.
I need to do some tweaking, but I feel like I'm in the ballpark.
Mark